Bonding
The Relay body is printed in sections and bonded together with G/Flex 650 epoxy into a single complete structure. This is distinct from hardware installation (mounting the bridge, tuners, and neck) — the body has to be solid and fully cured before any of that begins. Take your time here. Bonds are permanent and alignment errors compound through every subsequent step.
Questions while you work? Chat in the Discord thread →
Before You Start
- Print all body segments from the Body and Cap models, including the alignment pegs. Extra pegs are provided.
- Check all mating surfaces for flatness. You want full surface contact, so sand with 120-grit to get all edges to sit flush. To ensure a good bond, lightly sand all joined surfaces even if they're already well matched.
- Do a dry fit of all parts before mixing any epoxy. Make sure to use the alignment pegs as you're checking everything. The pegs may need to be trimmed or sanded in order to fit.
- Clamps must be used to keep the parts secure while the epoxy cures. Plan out how you will clamp everything togehter and test your strategy. Doing a dry run now and seeing how things might go wrong will save you from making a big sticky mess later.
Bonding
To make sure that all of the pieces fit together easily, it is important that you follow the sequence described here.
Bond the Body
- Make sure that all bonding surfaces are clean and free of oils. Rubbing alcohol or acetone can be used to prep the surfaces.
- Insert the alignment pegs into the pockets on the outside of the inner-most pieces. I have found that it's easiest to hold these in place with super (CA) glue so that they don't move around later, but that's not required. The pegs are there for alignment and not structure, so it's ok if they don't fit tightly.
- Mix the epoxy resin and apply a thin layer to at least one side of every surface to be joined. Do not leave any bare spots. It's better to have a little too much than not enough. You will be scraping away excess that squishes out later. Your goal is to have enough resin in there so that every seam has some squishing out later. However, if you use too much, you'll make the finishing process a lot more labor-intensive. The G/Flex takes 45 minutes to set, so you can take your time.
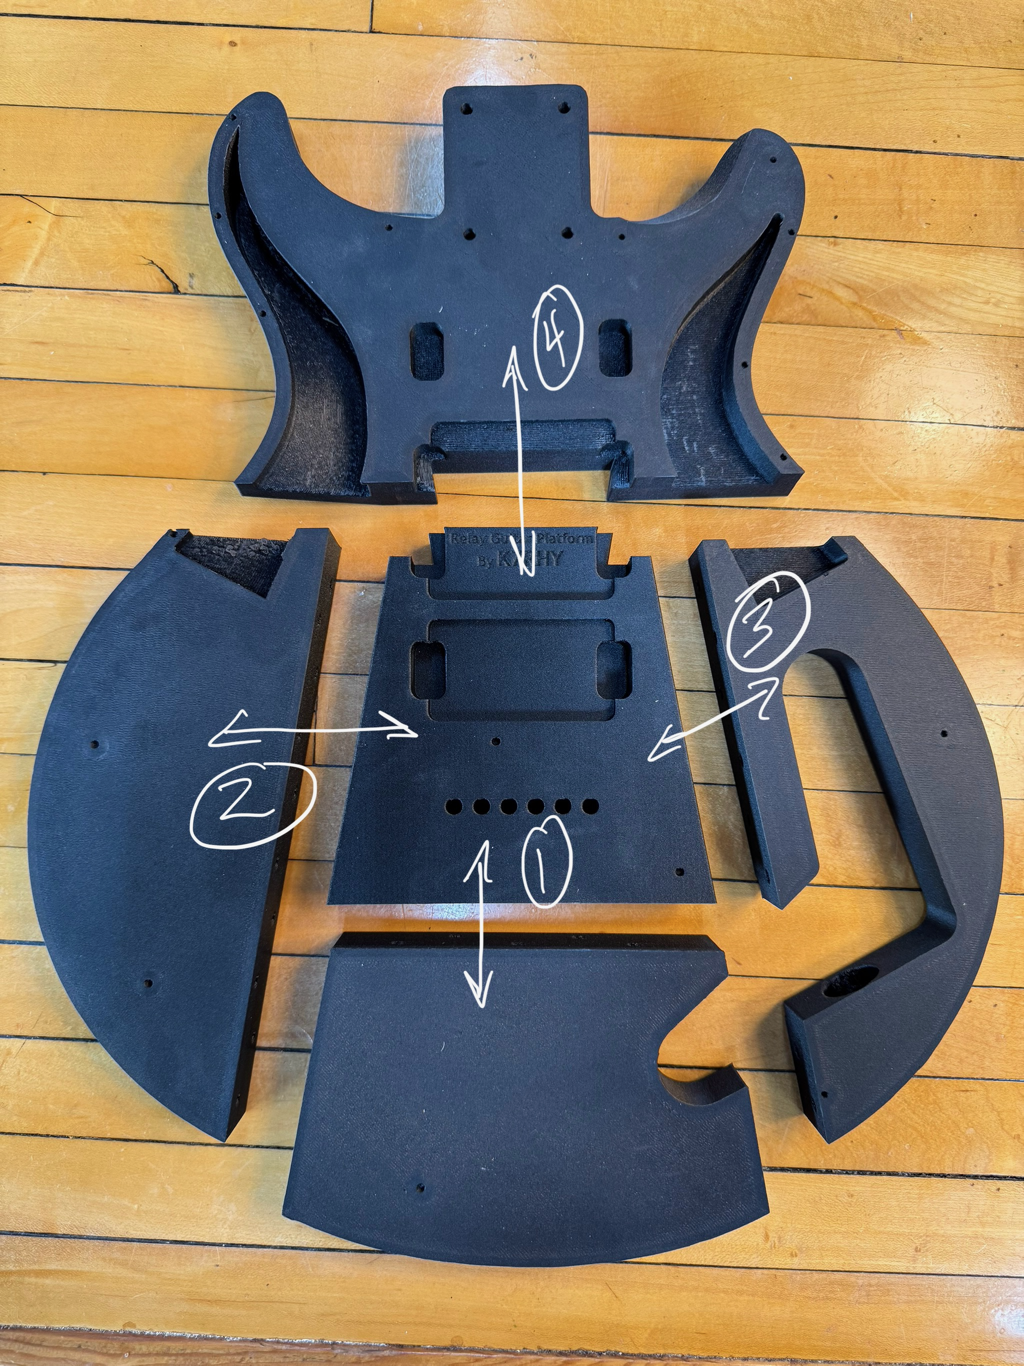
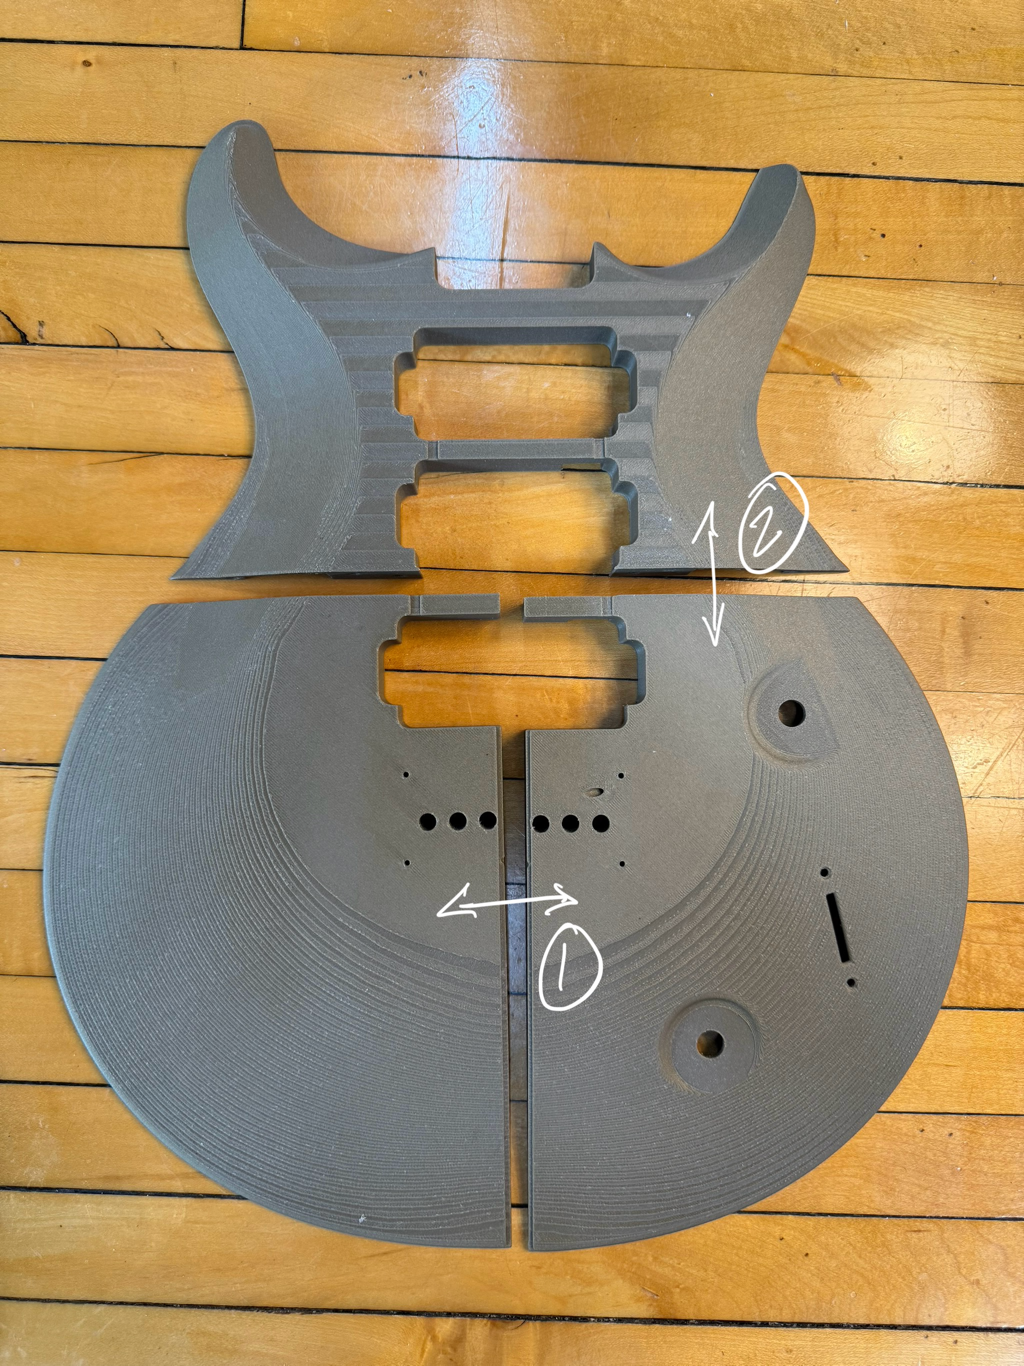
- Join the pieces together in the order shown in this image.
- Clamp everything together firmly. Make sure to align the seams such that the top edge is as flat as possible. Leave the clamped body undisturbed for 7-10 hours.
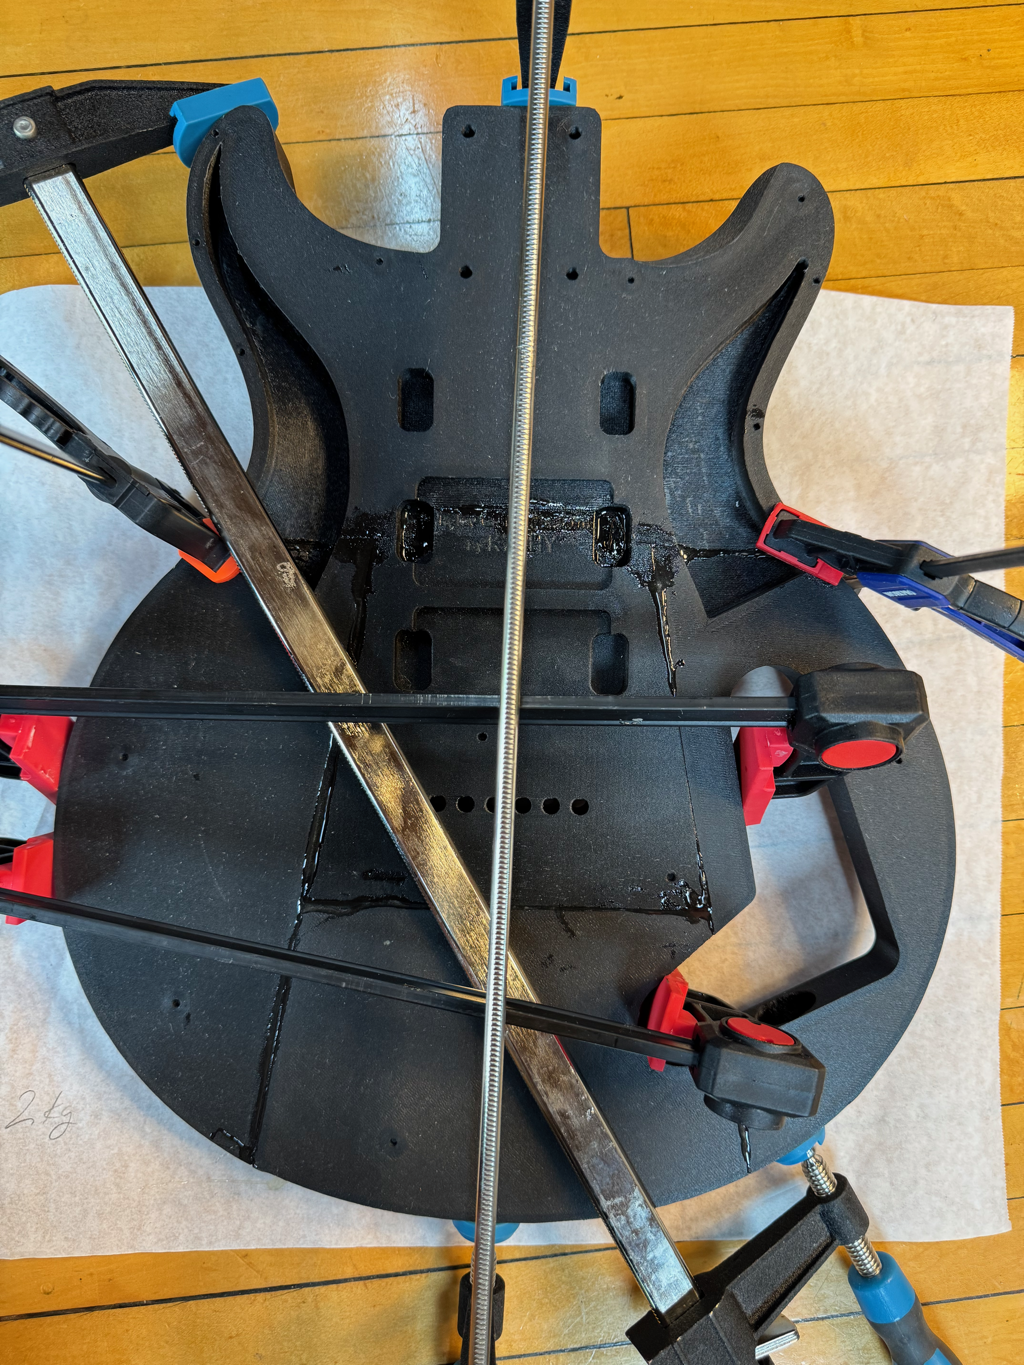
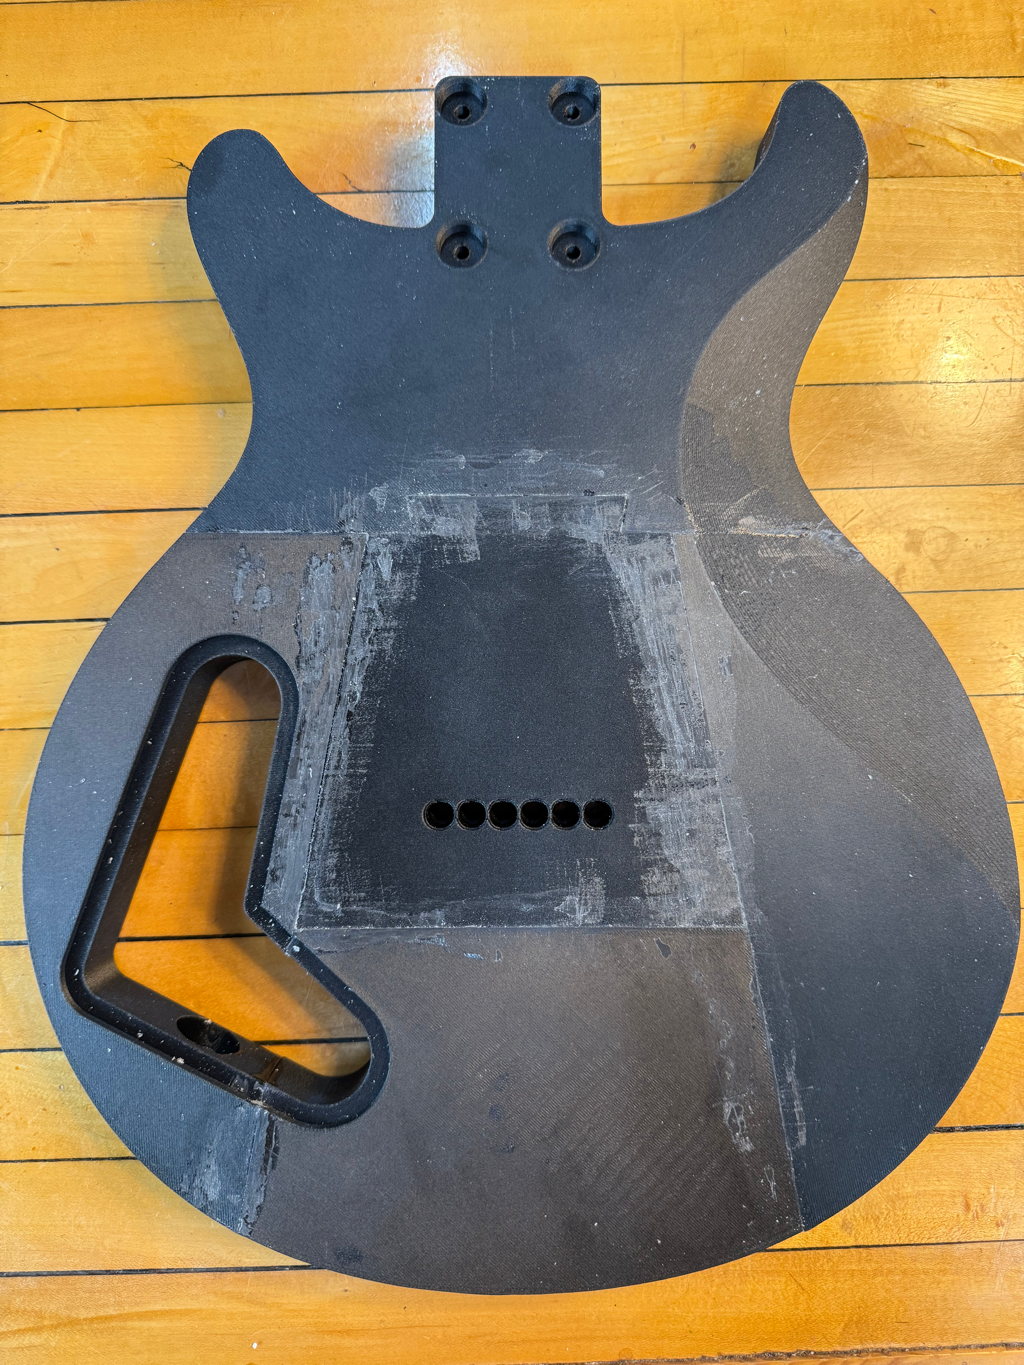
- It takes 24 hours for the resin to cure completely. However, it's strong enough to hold everything together very well after 7 hours. You can remove the clamps. This is a good time to start removing the excess resin. After the resin has been curing for about 10 hours, it gets significantly harder to remove it. I use a chisel and a carving knife for this step. It's going to look ugly, and that's ok. It's even ok if you scratch the body up a bit. Later, you'll be sanding everything down and that'll remove any marks you make. The body was printed with extra thick walls so that there's going to be plenty of material left after sanding.
Bond the Cap to the Body
Do not attempt to attach the cap to the body until the body has been curing for at least 7 hours. A full cure isn't necessary.
- Lightly sand the top surface of the body to prepare it for joining and clean with alcohol or acetone. If the top surface isn't a flat plane, you should sand agressively using a large sanding block so that the cap has a flat surface to attach to.
- Ligntly sand the bottom cap surfaces and all other join surfaces to prepare them for bonding. Clean with alcohol or acetone.
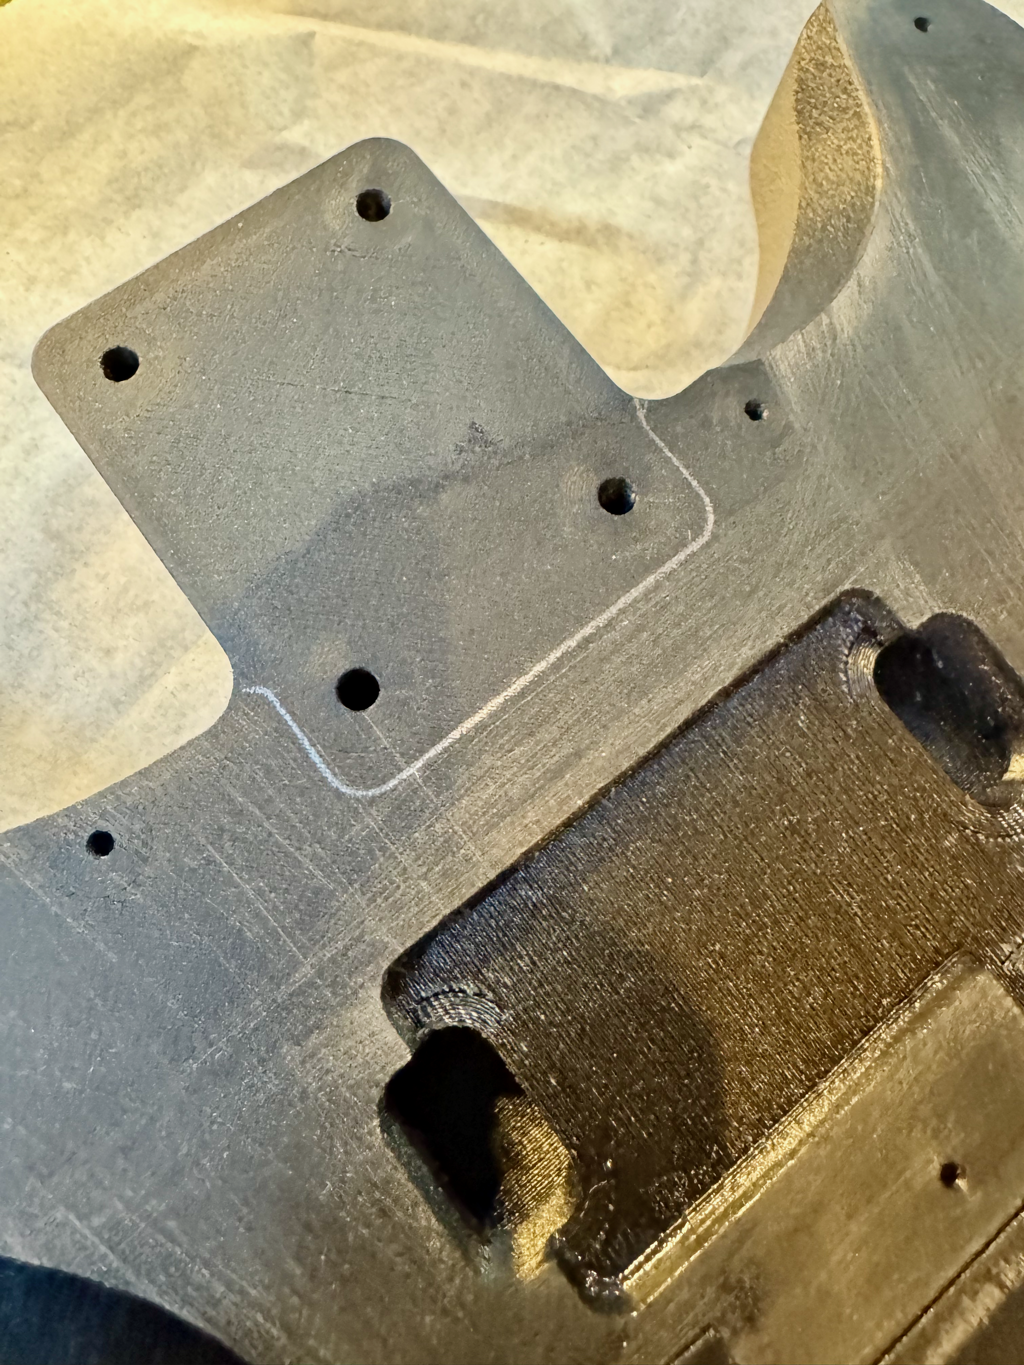
- Test fit the cap to the body using the large alignment pegs between the cap pieces and the small pegs between the cap and body. Due to differences in printer tolerances, the pegs may not fit perfectly. I have found that I usually need to modify them a bit to make sure everything can fit together well. Pay particular attention to the heigh of the small pegs. You want to be sure that the cap fits flush against the body. Trim them if needed.
- With the pieces assembled, use a pencil to trace the outline of the neck pocket and pickup cavities onto the body. You will use this marking later to make sure that you're only applying resin to the areas that are being joined.
- Remove the cap from the body.
- To keep the alignment pegs from moving around as you're applying the epoxy resin to the body, I recommend that you attach the small pegs to the body with super (CA) glue. If desired, do the same for the larger alignment pegs in the cap. Only glue them into one side though because we'll be using epoxy to join the panels together.
- Mix the epoxy resin and apply it thinly to the body surfaces that will be in contact with the cap. This is where your tracing marks will come in handy.
- Put epoxy along the thin edges of the cap that will be joined to each other.
- This part will get a little messy. Attach the cap panels together and then lift the assembly onto the prepared body. Adjust the panels until they all fall onto the small alignment pegs. The edges of the cap might not fit together snugly anymore and that's ok. They should still fit closely enough that there is resin squishing out from the seams. If not, you can add more resin to fill in the gaps. it's easiest to assemble the pieces if you do it in the order shown here.
- Clamp the cap securely to the body or weigh it down to keep the surfaces held together firmly.
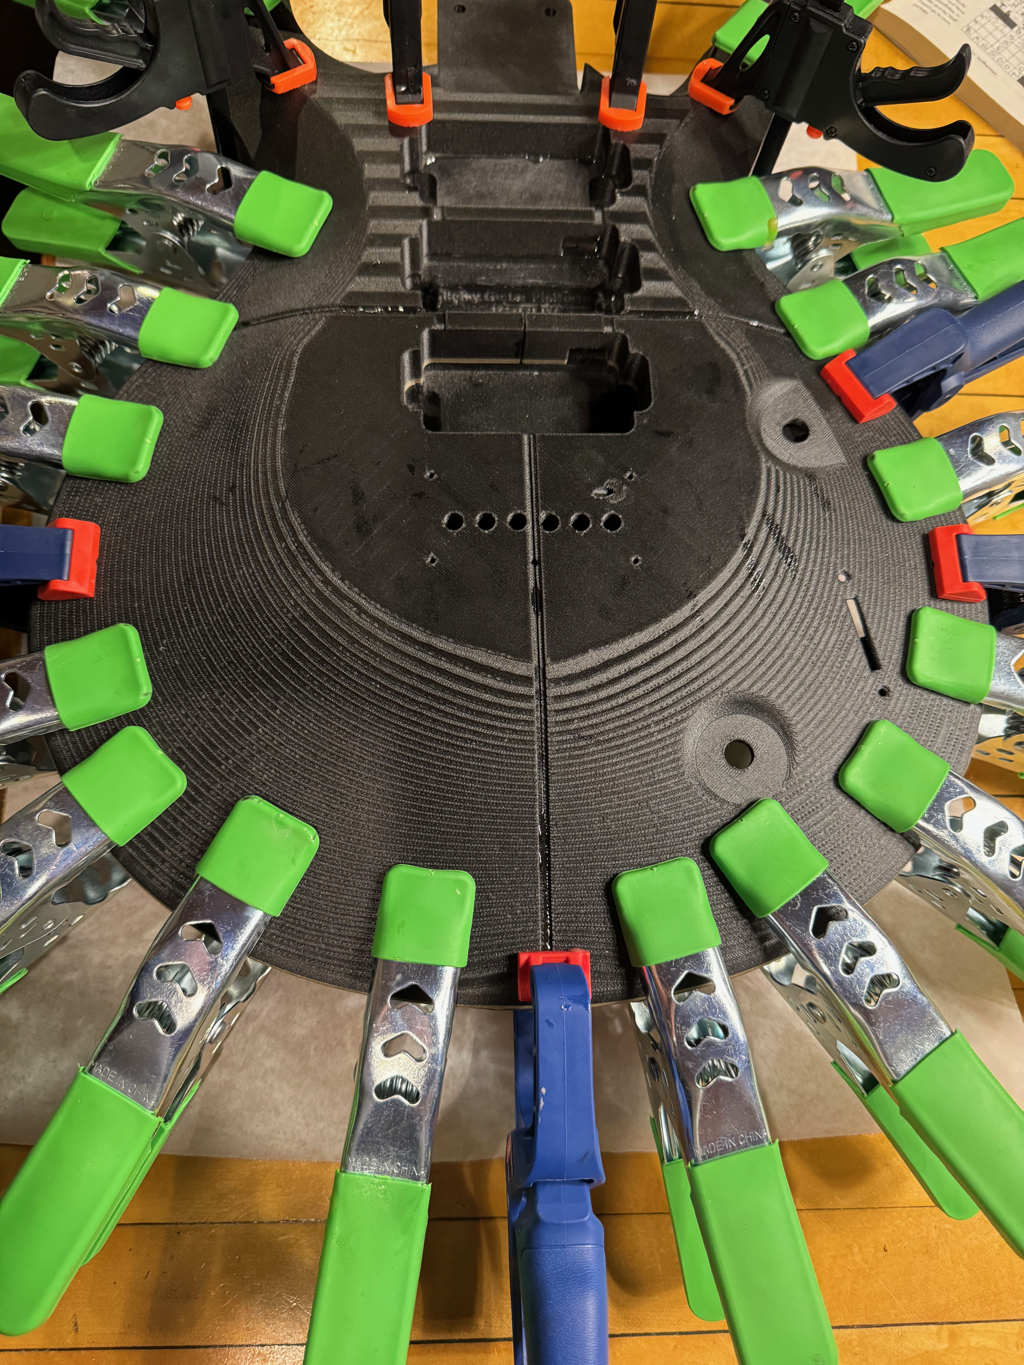
- Wait at least 7 hours before removing the clamps. Once the clamps are removed, you can clean up the excess resin the same way you did when you joined the body.
Apply the Inlay Detail
There's a groove along the center seam of the cap. This is for an inlay that will hide the seam. If the groove is even along its length, you can print up an inlay to put in there (a rectangle 1mm thick by ~3.6mm wide, and 200mm long). If you use this method, you can super (CA) glue it in.
My preferred method is to fill the groove with a quick-setting epoxy tinted to some interesting color.
Final Inspection
Before continuing on to the finishing stage, inspect all the joined seams. If there are any gaps, now is a good time to fill them. This step is cosmetic, so the seams can be filled with a quick-setting epoxy or other filling material. Your choice here depends on how you intend to finish the surface later. If you're going to paint it an opaque color later, then it's ok to fill it with a filler of a different color.
Remove any of the remaining epoxy that has squished out of the seams. Pay particular attention to the neck pocket.
See Finishing for surface prep before hardware installation.
Community
From the community
- NPC (Rhy): This thread is for questions about bonding the printed body components.